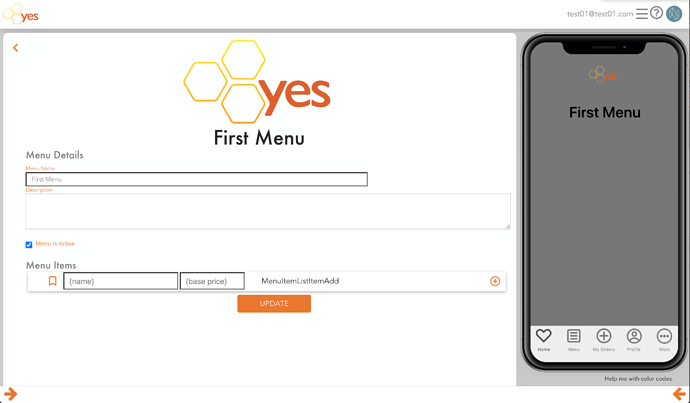
The Menu Detail screen is relatively straight forward. This screen is where the menu can be named, and a description can be added. Menus are “active” (displayed to all users) by default, but you can deactivate a menu at any time by unchecking the “Menu is Active” button and hitting the “Update” button. Inactive Menus can be accessed on the website, but won’t appear on the app.
Menu Items
Menu items are the items for sale. (For those who work with SKUs, these would represent your various SKUs.)
-
Adding a Menu Item
Add a menu item by providing a name in the {name} field. If there is an associated price for that menu item, add it in the {base price} field. (Note - prices are currently in cents, so a Menu Item with a price of $5.00 would be entered as “500” and an item with a price of $11.99 would be entered as “1199”) -
Delete a Menu Item
You may choose to remove a menu item by clicking / tapping the associated trash icon ( ).
). -
Editing a Menu Item
Editing a menu item by clicking / tapping on the name of the menu item or the base price. The name will switch to a field where you can update the order, the name, or the base price of a menu item. Save the changes with the save icon ( ).
).
-
Managing a Menu Item
You may manage it from the “Menu Item Screen” which is accessed by clicking / tapping the associated edit icon ( )
)
-
Promoting a Menu Item
Promoting a menu item will put it on the home screen, front and center for your customers, making it easy for them to select, order and pay for quickly. Select your promoted menu items by clicking / tapping the heart icon ( ) to fill it in (
 ).
).


